
DIY week: Make your own play dough!
/Hi everyone! I hope you’re all battening your respective hatches for the snowstorm headed our way. With this global warming we’re going to have to change the saying to “March comes in like a lamb—that got mauled by a lion.” We may all be looking for indoor activities on Tuesday, so this is the perfect time to launch our monthly DIY project series. I’m more artsy than craftsy, so I relied on guest blogger Amy Rios from the blog A Beautiful Friendship to show us how to make our own play dough. This is a great sensory play project to make with your kids. Read on for her account below:
This play dough experiment began with a recipe I found on Pinterest called The Best Ever No Cook Play dough. My son normally plays with play dough multiple times a week and he will play sometimes for a solid hour, so this was the perfect project for us.

Click here for the recipe I used from the Imagination Tree.

INGREDIENTS
2 cups of flour
1/2 cup of salt
2 Tbsp cream of tarter
2 Tbsp Oil (whatever you have on hand) – my picture is missing oil
Up to 1 1/2 cups boiling water
Food coloring (I like the gel food coloring)
A few drops of glycerin
The only part I changed from this recipe is that I do not color the boiling water. I had done that in a previous batch and I ended up with too much play dough for each color. I found another recipe that recommended kneading the dough and then splitting it and coloring portions of the dough, which I prefer.
INSTRUCTIONS
1. Sift the flour.

2. Stir in the oil.

3. Boil the water. (Mamma does the boiling.) Let it cool, and then . . .
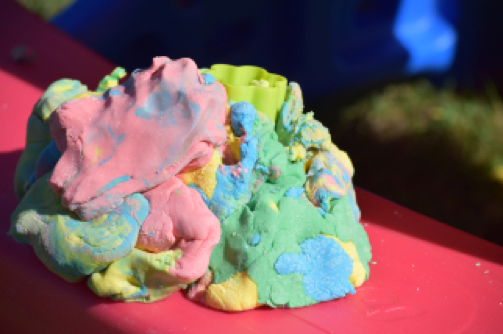
4. Knead . . . and knead and knead and knead. . . . Trust me it’s worth it. My Apple Watch told me I burned nearly 700 calories making this stuff. It is literally the softest and nicest play dough ever. It doesn’t have that store bought smell. And the kids can eat it and you aren’t worried about what they are eating—though I am always telling mine not to eat it, but mostly because I don’t want to have to make it again.
5. Add the coloring and knead some more.

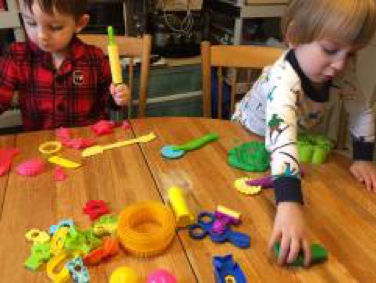
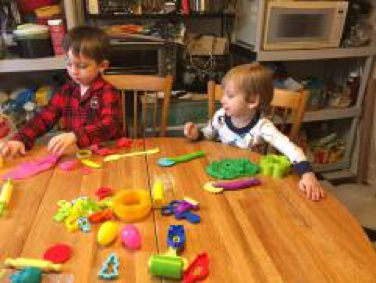
Now enjoy playing with all that lovely dough you just made! I bought a few cookie cutter sets in different shapes and sizes at the dollar store. The kids loved it! And long after the boys left us adults were sitting there playing with the play dough . . . haha. My little one played with it for virtually a year; all I had to do was liven it up with a little glycerin from time to time.

Seems easy enough, right? Thanks so much to Amy for sharing this recipe with us. For other ideas and inspirations, check our her blog, A Beautiful Friendship. If you want your kids craft project featured in our monthly DIY post, send an email to babygotchat@gmail.com. And as always, check our website for events and weekly library programs.
See you next time!
Andrea